|
PHOTOGRAMS
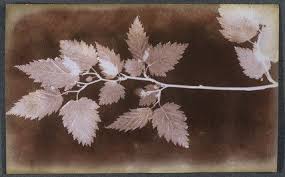
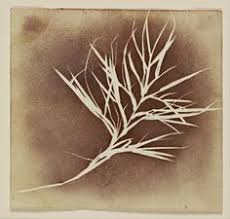
What is a Photogram? A photogram is a photographic print made by placing objects onto light sensitive paper and exposing light from above. In the 1830s, William Fox Talbot, a pioneer of the photography, started making photograms of plants, which he referred to as ' photogenic drawings'. Any object can be placed on photographic paper paper however, transparent objects with interesting silhouettes are more effective. Most photograms made in the 1800 were documentary experiments and it wasn't until the Modernist movement in the 20th century that artists started to make photograms as art works focusing on form, movement and space. How to Make a Photogram 1. Set up your enlarger to be F11 or F8, making sure your filter is on 3. 2.Raise or lower your enlarger lamp for an area larger than 5x7 paper and focus. 3.Set your timer to 3 seconds. 4.Make sure to turn off your lamp. 5. Take a piece of photo paper and centre it under where your light will shine. 6.Place all objects on top of the paper, according to your design. 7.Take a piece of cardboard, cover 2/3rds of the paper and press your timer light. After the timer goes off, move the cardboard to cover the second 1/3rd of your paper and press the timer light again. When the light goes off, completely remove your cardboard and hit the timer light for a third time. 8.You are now ready to develop your test strip. 9.Once you have assessed how many seconds would be best, set your timer to that amount of time. Place a new sheet of paper down with ur objects on top of it again and hit the timer once. 10.You are now ready to develop your print. Test Strip
Before I created my photograms I made a test strip to see how much time my photo paper needed to be exposed to the light. A test strip is a small piece of photographic paper which you expose to light for certain amounts of time. I felt that my test strip was not very successful as it is quite hard to see the images as I did not expose my test strip to the light for long enough. 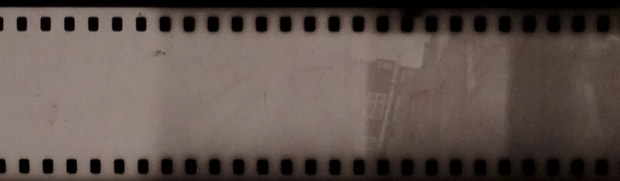

|
My Photograms When making my photograms I exposed my photographic paper for about 4-6 seconds. This was the most successful exposure time for me however not all my photograms were not successful. 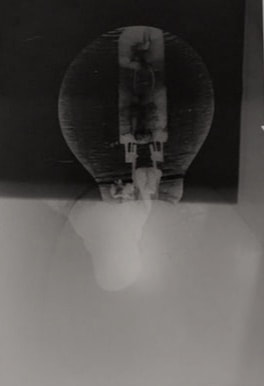
First Response: I feel that this was not successful due to many factors. For example, my photo paper was moved half way through exposing it to light meaning that half of it was not exposed leading to one side being dark and the other side being light. Another factor I do not like about my photogram is that it does not have any strong whites meaning that it is not very bold and there is no strong contrast between the whites and the blacks. However an element of it which I do like is the small lines running across the light bulb. I like this because it hints to the fact that there is actually glass there. 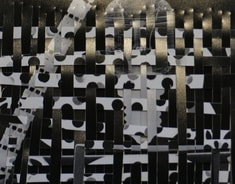
To create this photogram I cross hatched two separate photogram. I did this by cutting them both up into thin lines going across landscape. I then intertwined them together layering one over the next. I like this effect because you have to look at the image for some time to truly understand what the original photograms were almost like a puzzle.
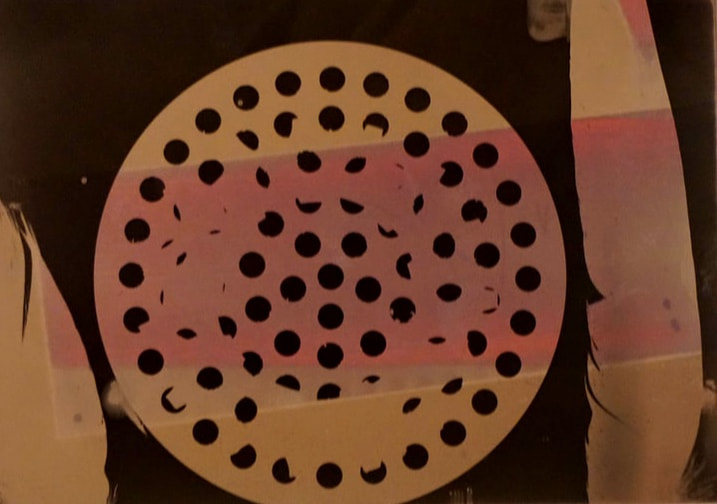
What Went Wrong Here?
For this photogram I did not put it into the stopping chemical. This means that the colours will continue to get darker over time until it is a black image. The stopper prevents this from happening by 'stopping' the colour from getting darker. However, although this photogram is not a success I still like the variation of colour which is produced. |
PINHOLE CAMERA
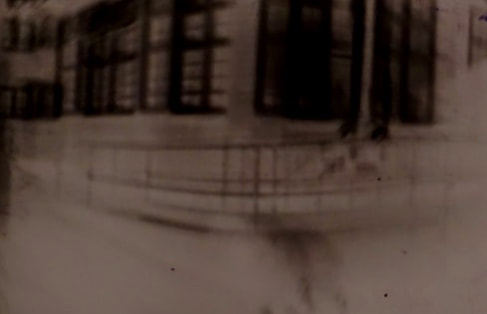
Instead of placing objects onto photo paper then exposing it to a controlled light source, like photograms I created, a pinhole camera can be used to create a photogram. A pinhole camera is a simple camera without a lens but with a tiny aperture, a pinhole- effectively a light proof box with a small hole in one side. Light fro, a scene passes through the aperture and projects an inverted image on the opposite side of the box, which is known as the camera obscura.
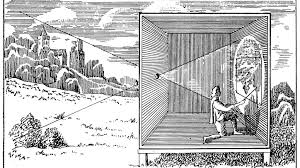
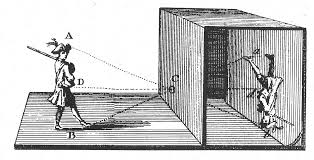
Camera obscura, ancestor of the photographic camera was first invented by Ibn Al-Haytham although many artists have redesigned it after. The Latin name means ' dark chamber' and the earliest versions, dating to antiquity, consisted of small darkened rooms with light admitted through a single tiny hole. The result was that an inverted image of the outside scene was cast on the opposite wall, which was usually whitened. For centuries the technique was used for the viewing eclipse of the Sun without endangering the eyes and by the 16th century as an aid to drawing; the subject was posed outside and the image reflected on a piece of drawing paper for the artist to trace. Portable versions were built, followed by smaller and even pocket models; the interior of the box was painted black and the image reflected by an angled mirror so that it could be viewed right side up.
I used a small Pringles can to create my pinhole camera. I did this by covering the lid and silver plastic in the inside of the can I thick black card.
This made my Pringles can light tight. I then cut out a small square (5mm) on one side of the Pringles can to allow some light to enter.
After doing that I created a flap above the small square so I could control when I wanted light to enter and not to enter.
Finally I placed a a sheet of photo paper inside the can on the opposite side of the square. Then I went outside and chose a view I wanted to capture and then set up the pinhole camera by holding is still and opening the flap for about 4-8 seconds.
By doing this I was allowing light to enter and hit the photo paper.